


As pet enthusiasts seek innovative solutions to support their pets during the critical birthing and early development stages, the choice of a suitable whelping box becomes paramount. Among the myriad of options available on the market, understanding the intricacies of assembling a specific whelping box model can make a significant difference in providing a safe, comfortable environment for mother and pups. This article aims to demystify the assembly process of a popular whelping box model, guiding pet owners through every step and ensuring that even novices can create a secure nesting place with ease.
Firstly, we delve into the “Components and Materials” of the whelping box, identifying each part that comes in the package and the quality of materials used, offering insights into the durability and comfort level of the finished product. The “Pre-Assembly Preparation” section outlines the initial steps and considerations before embarking on the assembly journey, setting the stage for a smooth building process. Our comprehensive “Step-by-Step Assembly Instructions” provide a detailed guide to putting the pieces together, ensuring clarity and ease of understanding for everyone, regardless of their DIY experience.
Moreover, understanding the “Tools Required for Assembly” is crucial, as having the right tools at hand can significantly expedite the assembly process and enhance the overall building experience. Finally, we cover “Safety and Maintenance Tips” to ensure that the whelping box not only serves its immediate purpose but also stands the test of time, providing a safe haven for future litters.
Through this article, pet owners will gain valuable knowledge on assembling a whelping box model, ensuring their furry friends have a comfortable and secure place for one of the most precious moments of their lives.
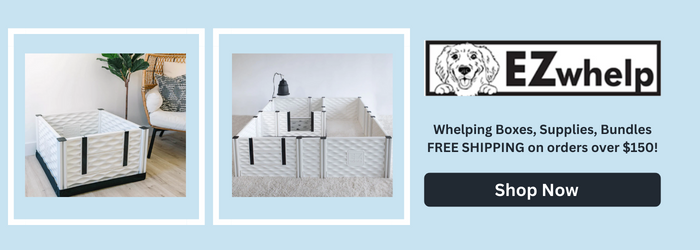
Components and Materials
When discussing the assembly process of a whelping box model, understanding the components and materials involved is crucial. This initial step lays the foundation for a successful assembly and ensures that the whelping box is safe and comfortable for the mother and her puppies.
The components typically include the base of the box, which provides support; walls or panels that attach to the base to create the enclosure; and sometimes a removable door or panel to allow the mother to enter and exit while keeping the puppies contained. The materials used for these components are vital for the durability and safety of the whelping box. Common materials include wood, plastic, or a combination of both. Wood offers a sturdy and natural option, but it must be properly treated to prevent moisture damage and to ensure it’s safe for the animals. Plastic, on the other hand, is easy to clean and disinfect but may not provide the same level of insulation as wood.
Furthermore, the whelping box might come with additional materials aimed at enhancing the comfort and well-being of the mother and her offspring. These can include a soft, washable lining for the base to provide warmth and cushioning for the puppies, and adjustable dividers to give the mother space and help prevent accidental smothering of the puppies.
Selecting a whelping box that uses high-quality materials and components is vital. Not only does it affect the longevity and ease of use of the box, but it also impacts the health and safety of the litter. Users should carefully review what is included in their whelping box model and ensure they have all necessary items before beginning assembly. Understanding the components and materials is the first step in this process, setting the stage for a well-prepared and successful assembly.
Pre-Assembly Preparation
Pre-Assembly Preparation is a critical phase in the assembly process of a whelping box model. This stage sets the groundwork for a smooth and efficient assembly, ensuring that all components fit together correctly and function as intended. The preparation involves several key steps, each designed to minimize issues and maximize the effectiveness of the assembly process.
Initially, it’s essential to verify that all components and materials listed in the instruction manual are present. This step prevents potential delays that could arise from missing parts. It’s also a good time to familiarize oneself with the different components, especially if they’re uniquely designed for this specific whelping box model. Understanding the parts and their functions can significantly streamline the assembly process.
After ensuring all parts are accounted for, the next step involves preparing the workspace. A clean, spacious area is ideal for laying out the components and tools needed for assembly. This not only helps in organizing the parts but also in preventing any damage to the components or the underlying surface. It’s advisable to work on a soft, non-abrasive surface to avoid scratching or damaging parts.
Another critical aspect of pre-assembly preparation is reviewing the assembly instructions thoroughly. This review should highlight any specific tools required, the estimated time for assembly, and any special instructions or warnings to be aware of. Understanding the assembly process in advance can help in anticipating and mitigating any challenges that might arise during the actual assembly.
Lastly, it’s beneficial to have all necessary tools ready and within reach. While some whelping box models are designed for easy assembly with minimal tools, others might require specific tools not commonly found in every household. Identifying and procuring these tools beforehand can prevent unnecessary interruptions once the assembly process begins.
In summary, pre-assembly preparation is about ensuring that everything is in place for a successful assembly of the whelping box model. By taking the time to properly prepare, one can significantly reduce the time and effort required to assemble the whelping box, leading to a more enjoyable and less stressful experience. This preparation helps in avoiding common pitfalls and sets the stage for a well-assembled product that meets or exceeds expectations.
Step-by-Step Assembly Instructions
The step-by-step assembly instructions are a crucial aspect of putting together a whelping box, ensuring that the process is straightforward and efficient for the user. These instructions typically begin with the preparation of the workspace, ensuring that all necessary components and tools are within reach and that there is sufficient space to work comfortably. It is important for these instructions to be clear and detailed, guiding the user through each step of the assembly process without assuming prior knowledge or experience.
The assembly process usually starts with the base of the whelping box, securing it to ensure a stable foundation. From there, the sides and any dividers are attached, often requiring careful alignment and the use of specific fasteners or connectors provided with the kit. Attention to detail is crucial in this stage to prevent any gaps or weaknesses in the structure that could harm the mother or her puppies.
Additional features, such as adjustable walls or floors for easy cleaning, are also assembled and installed at this stage, following the manufacturer’s guidance for optimal placement and functionality. The instructions might include tips for ensuring these elements are securely fastened and operate as intended, enhancing the safety and usability of the whelping box.
Finally, the assembly instructions conclude with finishing touches, such as the installation of comfort features like heating pads or bedding. The manufacturer may also provide advice on initial use, such as how to introduce the mother to the whelping box and ensure it is a comfortable and safe environment for her and her puppies.
Throughout the assembly process, it is essential for the user to refer back to the instructions regularly, ensuring each step is completed accurately and safely. This careful attention to detail will help ensure the whelping box is a secure and nurturing space for the critical early stages of a puppy’s life.
Tools Required for Assembly
The assembly process of a whelping box model is greatly facilitated by having the right tools at hand. The “Tools Required for Assembly” section is a critical part of the assembly process, ensuring that individuals are well-prepared before they begin putting their whelping box together. This preparation step cannot be overstated, as having the appropriate tools not only streamlines the assembly process but also significantly reduces the risk of injury or damage to the components.
Typically, the tools needed for assembling a whelping box might include standard items such as a screwdriver, a hammer, and perhaps a wrench. However, the exact tools required can vary depending on the complexity and design of the whelping box. Some models might require specialized tools due to unique fasteners or materials used in their construction. It’s important for the assembler to review the list of required tools carefully before starting. This ensures that all necessary tools are available from the outset, avoiding interruptions during the assembly process.
Having a clear understanding of the tools needed also allows for better planning and efficiency. For example, if a power drill is recommended, ensuring it’s charged or plugged in before starting can save time. Additionally, understanding the purpose of each tool and how it will be used during assembly can help prevent mistakes and ensure the whelping box is assembled correctly and safely.
In summary, the “Tools Required for Assembly” section is essential for ensuring a smooth, efficient, and safe assembly process for whelping boxes. It not only aids in preparation but also contributes to the overall success of the assembly, resulting in a sturdy and reliable product that can safely accommodate a mother and her puppies during the critical early stages of life.
Safety and Maintenance Tips
When it comes to the assembly process of a whelping box model, understanding and adhering to safety and maintenance tips is crucial to ensure both the wellbeing of the person assembling the box and the future occupants—mother and puppies. This aspect, often considered the final but ongoing step, encompasses a variety of practices designed to prevent accidents and prolong the life of the whelping box.
Firstly, safety during assembly cannot be overstated. It is essential to use the correct tools as specified in the assembly instructions to avoid injury. Wearing protective gear, such as gloves and safety glasses, can provide an additional layer of safety, especially when dealing with power tools or sharp edges. Additionally, ensuring that the assembly area is well-lit and free of clutter can help prevent trips and falls, further promoting a safe assembly process.
After the whelping box is assembled, maintenance becomes the key to ensuring its longevity and the safety of its occupants. Regular inspections for any signs of wear and tear, such as splinters or loose screws, are essential. These issues should be addressed immediately to prevent injuries to the puppies or their mother. Cleaning the box is also an important aspect of maintenance. The materials used in the construction of the box should be safe for thorough cleaning and disinfection, which is necessary to prevent the spread of disease among the litter.
Moreover, maintaining the structural integrity of the whelping box is critical. This means periodically checking that all components remain tightly secured and that the box continues to provide a stable, secure environment for the dogs. Adjustments or reinforcements may be needed over time, especially if the box is used for multiple litters.
In summary, while the initial assembly of a whelping box is a crucial step in preparing for a litter of puppies, the importance of ongoing safety and maintenance practices cannot be overlooked. These practices are essential for the well-being of both the canine occupants and the people who care for them. By following proper safety guidelines during assembly and maintaining the box diligently, breeders can provide a secure and healthy environment for whelping and raising puppies.